SATAN 관련자료

from Study/Security 2009/02/09 06:52 view 22201


Gaining Access and Securing the Gateway
  IP Spoofing and Sniffing
  How to Build a Firewall
  SATAN and the Internet Inferno
  Kerberos
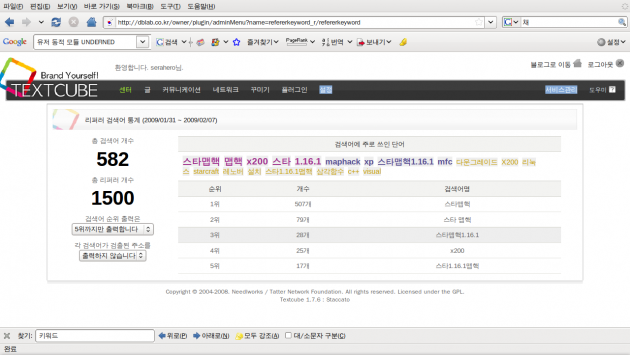
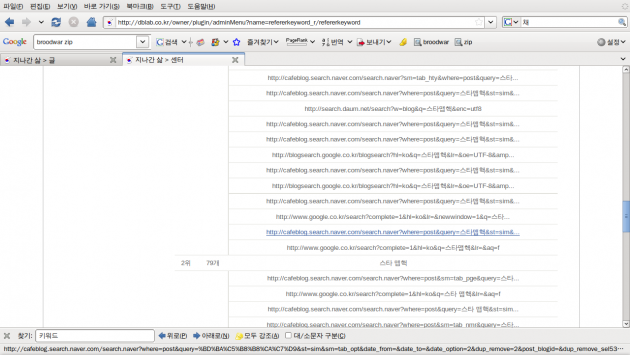
키워드 검색 중에서 '스타 맵핵'을 타겟으로 하나 올려봐더니 ..

사용자 삽입 이미지

방문자가 100명 내외 였는데 5배가 증가하여 500명 이상이 접속하여 트랙백 발생 크리..ㅠ_ㅠ

그래서 바로 삭제 했다.ㅋㅋ;; 부담스러워..

사용자 삽입 이미지

다음/구글/네이버 순으로 검색되는 것을 볼 수 있다. 이런걸 보면 웹의 검색 시스템이 어떤 방식으로 내 블로그 글을 가져가는 건지 궁금해진다. -_ㅡ;; 어렵겠지;;;  아직도 글의 흔적이 웹에 남아있는데 어떻게 해야 지워질까;;

웹에 포스팅했던 정보가 남아있는 건 그 쪽의 일종의 검색정보 저장소에 남겨두고 읽어들이기 때문인가..
제발 좀 지워줘 ㅜ_ㅜ....

결론 : 방문자 늘리려면 인기키워드로 포스팅하면 된다.

컬투2시쇼 사연- 돌아와요 미스김

from etc/Comic 2009/02/06 20:03 view 49511
더 많은 컬투 라디오 듣기 : http://rudolph.kr/ <= 공식 컬투 라디오 다시듣기
주의 - 너무 웃김 ㅋㅋㅋㅋ // -_ㅡ  파폭(?) 에서 앞으로 넘기면 재생안됨, 크롬은아예 안됨 ㅠ_ㅠ

돌아와요 미스김 1편


돌아와요 미스김 2편


다 덤벼~ - 고양이

from etc/Picture 2009/02/05 21:24 view 20128
네이버 포토
네잎크로버를 찾아라!!-_-..


Ubuntu Package Update

from Info/OS 2009/01/19 10:00 view 25018
우분투 엔 패키지가 별로 없다...

그래서  $man malloc => No
manual entry for malloc 라는 문구가 나온다.
apt-get install manpages-dev 설치하자....


Tag |
링크 : 1. http://www.thinkwiki.org/wiki/Installation_instructions_for_the_ThinkPad_X200
         2.F10 and xorg intel driver: solved
3.http://intellinuxgraphics.org/download.html


에러 해결 #1 : 링크2에 설치 법대로 inter driver 를 깔다가 에러 나는경우 yum install xorg-x11-server-dev*

./configure: line 21484: syntax error near unexpected token `XINERAMA,’
./configure: line 21484: `XORG_DRIVER_CHECK_EXT(XINERAMA, xineramaproto)’

However after installing ‘xorg-x11-server-devel-1.5.3-6.fc10.i386′ it worked correctly.


// Fedora10 경우에도 /etc/X11/xorg.conf 에 설정함..
ㅜ_ㅜ 위 링크에 전부 설명 되어있다. 괜히 찾아 돌아다니지 말자..

Ubuntu(우분투) 에서 필요한 설정 몇가지..

1. 듀얼모니터(dual monitor) 설정

Display


With 8.10 things don't work well if you stick with the "preconfigured" xorg.conf settings: the default resolution is only 1074x768 and the highest setting that the laptop display is capable of (1280x800) doesn't even show up in the System -> Preferences -> Screen Resolution applet. To make matters worse, VGA output is a royal pain.

Here's a step-by-step guide to improve the situation if you just want to get the laptop display working properly:

  • First, make sure you've got the latest drivers for your Intel 4500MHD video card:
$ sudo apt-get install xserver-xorg-video-intel
On current 8.10, this step seems unnecessary. You get intel by default, and by this point in the install, you should have already have updated your packages. Mitchell 01:28, 15 December 2008 (CET)
  • Once that's over and done with, open up your xorg.conf file (note: be careful with this file):
$ sudo gedit /etc/X11/xorg.conf
  • Make the part that isn't commented out (i.e. that isn't preceded by a #) look like this:
Section "Monitor"
Identifier "Configured Monitor"
EndSection

Section "Monitor"
Identifier "HDMI-1"
Option "Ignore" "True"
EndSection

Section "Monitor"
Identifier "HDMI-2"
Option "Ignore" "True"
EndSection

Section "Screen"
Identifier "Default Screen"
Monitor "Configured Monitor"
Device "Configured Video Device"
DefaultDepth 24
SubSection "Display"
Modes "1280x800" "1024x768"
# The following line was an auto-configuration added by an external VGA projector; you might leave it out to try
# letting the system detect dimensions appropriate for whatever display you happen to use.
Virtual 2432 864
EndSubSection
EndSection

Section "Device"
Identifier "Configured Video Device"
Driver "intel"
Option "monitor-HDMI-1" "HDMI-1"
Option "monitor-HDMI-2" "HDMI-2"
EndSection

2. Track Point( 스크롤 키 설정 )

TrackPoint

Trackpoint scrolling is, as of 12/02/08, not in a good way on 8.10.

There are numerous instructions on the net which don't work for the X200, including instructions here ([How to configure the TrackPoint]).

On the X200, the HAL-based instructions in the last section may work, but only until suspend/resume or VT switching, due to a bug in evdev.

I do have it working, but it is not pretty:

  • Create a patched evdev. The following is based on instructions from the bug report. These instructions will be extremely fragile - they work for me today but could stop working at any point, based on updates to evdev or changes to the bug. The lines below do the following:
    • Set up a work area
    • Download the patch from the bug report
    • Prepare your environment for building evdev
    • Download the evdev sources
    • Patch them
    • Produce a new deb
    • Install it
sudo bash
cd /usr/local/src/
mkdir evdev
cd evdev
wget http://launchpadlibrarian.net/19254960/preinit.diff
apt-get build-dep xserver-xorg-input-evdev
apt-get source xserver-xorg-input-evdev
cd xserver-xorg-input-evdev-2.0.99+git20080912
patch -p1 < ../preinit.diff
debian/rules binary
cd ..
dpkg -i xserver-xorg-input-evdev_2.0.99*.deb
  • Add xinput lines to your .profile; with this patch, the normal HAL method no longer works (though note, I have not tested this with no hal policy for the trackpoint at all, just left the non-working one in place. YMMV).
# TEMPORARY FIX FOR BROKEN EVDEV/HAL for TrackPoint scrolling:
xinput set-int-prop "TPPS/2 IBM TrackPoint" "Wheel Emulation" 8 1
xinput set-int-prop "TPPS/2 IBM TrackPoint" "Wheel Emulation Button" 8 2
xinput set-int-prop "TPPS/2 IBM TrackPoint" "Wheel Emulation Y Axis" 8 4 5
  • reboot your system.

This _should_ enable trackpoint scrolling that will be durable through suspend/resumes.

At some point they will fix the upstream evdev package, and/or adjust other configs. You may see this suddenly stop working after an update (evdev was updated but this fix wasn't in the update); in which case, re-run the steps above to create an updated patched evdev (hopefully). Or the update may carry an upstream fix; latest word in the bug is that the unstable upstream debian packages work out of the box. In which case you should simply come back and reexamine whether the xinput lines in the .profile are still necessary at a later date, or you can use the more canonical HAL profile to control the trackpoint properties.

Using HAL policy

For me this works fine (Ubuntu 8.10):

Create an file /etc/hal/fdi/policy/mouse-wheel.fdi an put the following into it:

<match key="info.product" string="TPPS/2 IBM TrackPoint">
<merge key="input.x11_options.EmulateWheel" type="string">true</merge>
<merge key="input.x11_options.EmulateWheelButton" type="string">2</merge>
<merge key="input.x11_options.YAxisMapping" type="string">4 5</merge>
<merge key="input.x11_options.XAxisMapping" type="string">6 7</merge>
<merge key="input.x11_options.Emulate3Buttons" type="string">true</merge>
<merge key="input.x11_options.EmulateWheelTimeout" type="string">200</merge>
</match>

Reboot and scrolling with the trackpoint should work.


Tag | , , ,
/sbin 폴더내에 실행파일들을 다른 경로에서 실행하게 하기 ㅜ_ㅜ

PATH 라 PATH 라고 한다면, 경로 라고 말씀 드리는게 편하겠네요..

간단하게 명령어를 예를 들겠습니다.

리눅스 상에서

# echo $PATH <-- 라고 일단, 쳐 보십시오.

/usr/local/sbin:/usr/local/bin:/sbin:/bin:/usr/sbin

이런 식으로 display가 되어 질겁니다.

useradd 란 명령어가 있습니다. /usr/sbin 이란 폴더에 존재 하죠.

우리가 사용자를 추가 하기 위해서 # usradd xxxx 라고 치면,

리눅스는 위의 $PATH 를 참조하여

위의 나열된 순서대로(/usr/local/sbin:/usr/local/bin:/sbin:/bin:/usr/sbin)

/usr/local/sbin 에 가서 useradd 를 찾고, 다음으로 /usr/local/bin 에 가서

useradd 를 찾습니다. 이런 식으로 path 에 지정된 위치들을

순서대로 찾아 가면서 위의 명령어를 찾게 되는거죠. 말 그대로 path(경로)

명령어의 경로를 지정해주는거죠. 우리가 직접적으로 /usr/sbin/useradd

와 같이 특정 위치를 지정해주지 않는 한 (../ ./ / <-- 특정 위치 지정)

path 에 따라서, 명령어를 찾아 주게 되는거죠.

그럼 이 PATH 를 변경은 어떻게 시켜줄까요?

사용자 측면에서 변경와 전체적인 변경이 존재 합니다.

사용자 측면이라면 (bash shell 사용시)

자신의 홈폴더의 (ls -al 자신의 홈 폴더 하면 보입니다.)

.bash_profile 이 있습니다.

# vi .bash_profile 하고 열어 보시면,

PATH=$PATH:$HOME/bin <-- 이런 부분이 보일겁니다.

# source .bash_profile

이 뒷 부분에 추가할 경로를 쳐주시면 사용자가 로그인시 PATH 환경

변수에 추가 되는거죠. (부팅시 .bash_profile 을 시작해준다.)

동일하게 전체적인 방식은

# vi /etc/profile

PATH=$PATH:/usr/local/sbin:/usr/local/tomcat/bin
export PATH

맨뒤에 위의 두줄을 추가 시켜 주시고

# source /etc/profile 해주시면 적용됩니다.

$PATH 나 $HOME 은 그 환경 변수의 값을 넣는다는 거죠.


* 만약 동일한 명령어가 path 에 잡혀 있는 경로 상에 두개가 존재 한다면

우선 하는 경로의 명령어가 실행 됩니다. 간혹 이런 문제로 인해 문제가 발생

하신 분들이 계십니다. 즉, 엉뚱한 명령어가 실행 되게 되는거죠. *
Tag |
내장 스피커의 소음 방지

생각보다 내장 스피커의 소음이 시끄럽다고 느낀다면 다음의 방법을 사용하여 소리가 나지 않게 할 수 있다.
X 윈도우 환경이라면 ~/.xsession 이나 ~/.xinitrc에서 다음과 같은 명령을 실행시켜 준다.

xset b off

bash 라면 /etc/inputrc 나 또는 $INPUTRC가 가지고 있는 장소에 다음과 같이 입력한다.

set bell-style none


tcsh 사용자라면 ~/.tcshrc 에 다음과 같이 입력한다.

set nobeep

한텀을 사용하는 경우라면 visual bell 기능을 사용할 수 있다.  

다음 한텀 리소스 파일에서 visual bell : false를 true로 바꿔주면 된다.

/usr/X11R6/lib/X11/app-defaults/Hanterm

그렇지 않으면 한텀 화면에서 Ctrl + 마우스 가운데 버튼을 눌러서 나오는 메뉴 중에서 Enable Visual bell을 선택하여 사용할 수도 있다.

만약에 사운드 카드가 있다면 커널을 패치하여 사운드 카드에서 소리를 조절함으로써 내장 스피커를 사용하지 않도록 할 수 있다. 먼저 하드웨어적인 설치를 한다. 즉 스피커의 선을 사운드 카드에 연결하는데 보통의 사운드 카드라면 이러한 일을 할 수 있도록 되어 있다. 그리고 다음의 장소에서 oplbeep를 가져온다.

ftp://sunsite.unc.edu/pub/Linux/apps/sound

oplbeep 는 표준 beeper를 Yamaha FM synthesizer 로 보내는 역할을 한다. 이것을 사용하기 위해서는 oplbeep.kernel-patch를 하고 커널을 재 컴파일한다. 그리고 인스톨 한 다음에 부팅을 시킨다. 그런 다음 Beep.o 라는 모듈을 만든다. 그리고 insmod 명령으로 인스톨을 시킨다.

insmod Beep.o OPL3_PORT=FM-synthesizer-port-address

synth의 주소는 부팅 메시지로부터 확인할 수 있다. 보통은 다음과 같다.

snd1 at 0x388 irq 0 drq 0

소리를 들어보고 좋으면 사용하고 아니면 rmmod Beep 명령으로 모듈을 제거해 줄 수 있다.
Tag |

특수기호

from Info/Some 2009/01/06 01:22 view 30864

! Exclamation Point 엑스클러메이션 포인트

" Quotation Mark  쿼테이션 마크

# Crosshatch/Sharp/Pound Sign 크로스해치/샵/파운드 사인
 
$ Dollar Sign 달러사인

%  Percent Sign 퍼센트사인

@ At Sign /Commercial At 앳 사인, 혹은 앳/커머셜 앳

& Ampersand  앰퍼샌드

`  (enter 바로옆) Apostrophe 어파스트로피

* Asterisk 애스터리스크

- Hyphen/Dash 하이픈/대시
.
 Period /Full Stop 피리어드/풀스탑

/ Slash/Virgule 슬래시/버귤

\ Back Slash 백슬래시

\ Won sign 원사인

: Colon 콜론

;  Semicolon  세미콜론

^ Circumflex 서컴플렉스

`(숫자 1 키 바로옆) Grave 그레이브

{  Left Brace 레프트 브레이스

} Right Brace 라이트 브레이스

[ Left Bracket 레프트 브래킷

] Right Bracket 라이트 브래킷

(  Left Parenthesis 레프트 퍼렌씨시스

) Right Parenthesis 라이트 퍼렌씨시스

|  Vertical Bar 버티컬바

~ Tilde 틸드

= Equal Sign 이퀄사인

+ Plus Sign 플러스사인

-  Minus Sign 마이너스사인

_ Underscore/Underline 언더스코어/언더라인

< Less Than Sign    /  Left Angle Bracket 레스댄 사인/레프트 앵글브래킷

> Greater Than Sign /  Right Angle Bracket 그레이터댄 사인/라이트 앵글브래킷

Tag |

VMware 상에서의 팁

from Info/Tools 2009/01/02 18:05 view 26693
1. 윈도우-Fedora 공유폴더 설정 or /usr/src/linux 가 없을 경우

일단, http://elecviolin.tistory.com/32 을 보고 설치하면 장땡..

문제는 폴더가 없다고 에러가 나는 경우이다.

'What is the location of the directory of C header files
that match your running kernel? [/usr/src/linux/include]'

'The path "/usr/src/linux/include" is not an existing directory.'

실제 경로가 없다. -_ㅡ..

만능설치기 yum으로 해결..
'yum install kernel-devel'

참고 : http://nosyu.pe.kr/1657?category=1

2. 윈도우와 클립보드 공유 and 화면에 리눅스 크기 맞추는 등 꼭 실행시켜놓을 것..

vmware-user

**마우스가 엉뚱한데 찍히는 버그 있음 -_ㅡ;; 어쩌다 이것저것 하다보니 되긴 했는데 잘 모르겠네...**

Tag | ,